You are currently browsing the archives for the Door Repair category


A Few Strange Hinges

Interim Hinge by McKinney

Interim Hinge

Above is pictured an interim hinge, used when your door and your frame have different sized hinge preps. For example, your frame is prepped for a five-inch by four-and-a-half inch hinge and your door is prepped for a four-and-a-half by four-and-a-half inch hinge. Why would you need such a thing? Inability to read a tape measure, perhaps?

Wide Throw Hinge

Wide Throw Hinge by McKinney

The hinge above is a wide throw hinge, used when you have a thick molding applied to the pull side face of the door frame. My illustration below shows the difference.

Sometimes people order wide throw hinges by accident because they do not know how to properly measure a full mortise hinge. Full mortise hinges are measured height first, then width. Wide throw hinges have a width that is greater than the height whereas standard hinges do not So if, for example, you order a 5 x 4-1/2 inch hinge you are getting a standard hinge and if you order a 4-1/2 x 5 inch hinge you are getting a wide throw hinge.

Half Mortise and Half Surface Hinges

Half Mortise and Half Surface HInges by McKinney

In the picture above, the half mortise hinge is on the left and the half surface hinge is on the right. As you can see by the “application’ drawings below each hinge, the half mortise hinge has the mortise prep on the door, and the half surface has the mortise prep on the frame. You can tell the half mortise at a glance because the surface leaf is narrow, for installation on the surface of the frame.


Exit Device Retrofitting Adventures

Monarch model 18

As door hardware evolves, new products emerge to replace older products. This may happen because of a design improvement, or because a company changes ownership, but in either case it means that there are older products in the field for which there are no exact replacements. Any door hardware product may become obsolete over time. Today we are talking about exit devices.

Falcon Model 25

In the mid-Twentieth Century mass production of doors was standardized so that the mortise pocket within a door that houses the mortise lock would always be the same size. Before this standardization mortise locks were available in a wide variety of sizes, but from this time forward all architectural grade lock fronts would be eight inches tall by one-and-a-quarter inches wide. Of course this affected mortise exit devices. So when I went to replace a Von Duprin 8875 mortise exit device manufactured sometime between 1897 and 1920, I found that the mortise pocket was only about six inches tall and I had a bit of cutting to do to make the new device fit.

Companies pay varying attention to the ‘retrofit-ability’ of their products. Some companies make it easy to replace an old device with a new one, and some do not. As an installer it is easy to find oneself marooned out in the field, having identified an exit device by its appearance for the purpose of providing an estimate to replace it, only to find out during installation that it is the old version, and installing the new version is either going to be a lot of extra work, or extra hardware that was not on the estimate.

For example, in the late 1990’s Von Duprin redesigned their narrow stile 33 and 35 series exit devices. The rails remained the same, but the heads were completely changed. The old version did not accept a rim cylinder tail piece, and the new one does. This means the old outside trim will by no means work with the new device – a potentially expensive problem if not anticipated.

Similarly the Precision 2000 series Apex devices are not backwards compatible with the old 1000 series trims.

Monarch was bought by Ingersoll Rand and rebranded under the Falcon line of products, now part of Allegion. During these transitions the trims changed part numbers two or maybe three times. Check with your favorite hardware genius as to whether the trim you have will work with the device you need.

The lesson here is not to judge by appearances. The new Von Duprin 33 looks a lot like the old one and the Precision 2000 looks just like the 1000 series. To avoid expensive mistakes, pull the device off the door and positively identify it before you write your estimate.

Both Doromatic and Jackson responded to the need to replace crossbar devices with touch bar devices by creating touch bar versions that fit the same footprint as their crossbar predecessors. The Doromatic 1690 and 1790 devices replace the 1990 and 2090, and the Jackson 2085 and 2095 replace the 1085 and 1095 devices with very little trouble. A big bonus is that a in the case of the 2085 Jackson and the 1690 Doromatic concealed vertical rod devices, you can reuse the exiting concealed vertical rods.


Knowing what you have is the key to knowing what you want.


locksnsafescom

Your source for quality security products with superior service!

Door Sag

Which door is sagging?

Which door is sagging?

I have mentioned this before, but it bears revisiting.  Lock problems and door problems are often related.  If the door is does not swing or is not hung properly the lock may not work properly either.

I bring this up now because I was recently called upon to go out and do actual work. I am no longer used to this and will usually refuse these opportunities, but my daughter called to say that the restaurant where she is working was having problems with their walk-in wine cooler. This small, chilled room is unfortunately located near the entrance of the restaurant, around the corner from virtually all activity except exiting and entering. Should an unscrupulous patron give the grade one cylindrical storeroom function lock a tug on their way out, the door would swing open, inviting pilferage of some very expensive vintages ranging in the hundreds of dollars. Some might even qualify as grand theft. So she asked if I would come out and have a look, and being the wonderful dad I am I grabbed my toolbox and cordless drill and headed out.

I managed not to hurt myself, so I am grateful.

When I arrived on the scene, I noticed immediately that the door was sagging – that is to say, it was no longer square within the door frame.  I could tell because – as in the handy picture I provided above – I could see that the gap between the header and the door was noticeably larger on the lock side than on the hinge side of the door.  I checked the top hinge screws – often the culprit in these situations – but all was well up there and all the screws were tight.   This could mean only one thing:  the door frame had settled with the building and was no longer square.  As a result the latch no longer lined up with the electric strike and the lock would no longer latch.

saghingeSince the door was wood I could have pulled the door, removed the hinges, planed the hinge edge and re-cut the top and middle hinge mortises to bring the lock edge up and back in line with the frame; or I could broken into the walls on both sides and adjusted the door frame so it would be square again.  But because I am old, tired, and was not getting paid I decided to take the easy way out:  I shimmed the bottom hinge, forcing the lock side of the door slightly up so that the lock would once again align with the electric strike.

To shim the bottom hinge I simply put a washer behind the hinge at the location shown in the picture  at right.  Then I explained to the restaurant manager that this was a temporary fix and that later on the door would most likely need attention again because the problem would probably recur.

So I left everyone happy and with a working door, but also with a warning.  Since the door frame is no longer square it is likely to continue in the same direction and someone (not me) will have to address it in the future.


And once again I looked like a … Hardware Genius.

Door Hardware Triage

The Medical Metaphor

medicalAs previously published in Doors and Hardware Magazine, Feb. 2016

As in the medical profession, correct diagnosis of door hardware problems is wholly dependent upon the knowledge, skill and powers of observation of the person whose job it is to correct the problem.  “The devil is in the details,” they say, and it is never truer than when said in reference to doors and hardware.

Another old saying, “ignorance is bliss,” can be liberally applied to who those innocent building occupants and visitors who think that the answer to a lock that is not latching is to slam it until it does – or until the hardware falls off, whichever comes first.  Yet by the same token, door hardware technicians who fail to look at door hardware problems holistically are equally blissful.  If you have ever seen the latch hole in an ANSI strike enlarged to include half the head of the bottom mounting screw in order to remedy what is clearly a hinge problem you will understand what I am talking about.

The above occurs because the technician sent to solve the problem is guilty of treating the symptoms while failing to diagnose the disease.  He or she observes that the latch is making contact with the strike too low to drop into the strike hole as it should, but does not question why this is happening.  This example is a simple one, but the principle applies to more complex problems as well.

Method

A great way to make sure you correctly identify a door hardware problem on the first visit is to have a consistent method of examining the total opening.   An example follows:

  1. If possible, speak with the person who has reported the problem, or better yet, meet with them at the opening so that they can show you what the problem is.
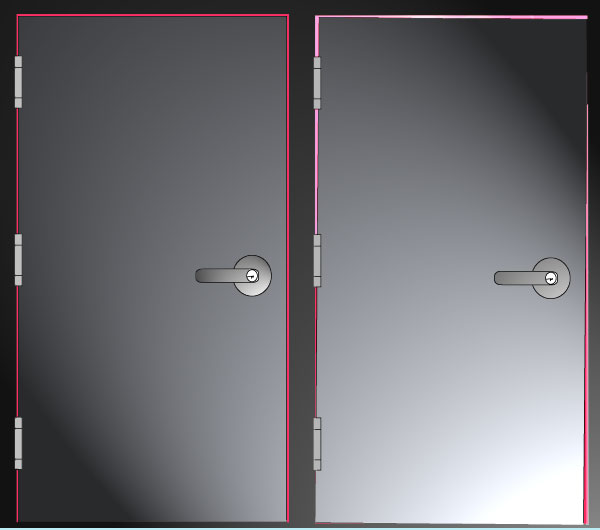
  2. As you approach the door, visually check the gap around the edges of the door on the top and both sides.  (The gap should be one-eighth inch.)  If the gap is greater in one place and less in another, the problem may be a bent hinge or misaligned frame.
    Open the door.  How does it feel?  Does the door itself stick?  If it has a latch, is there resistance when you turn the lever to retract it?  Do the hinges groan or squeak?
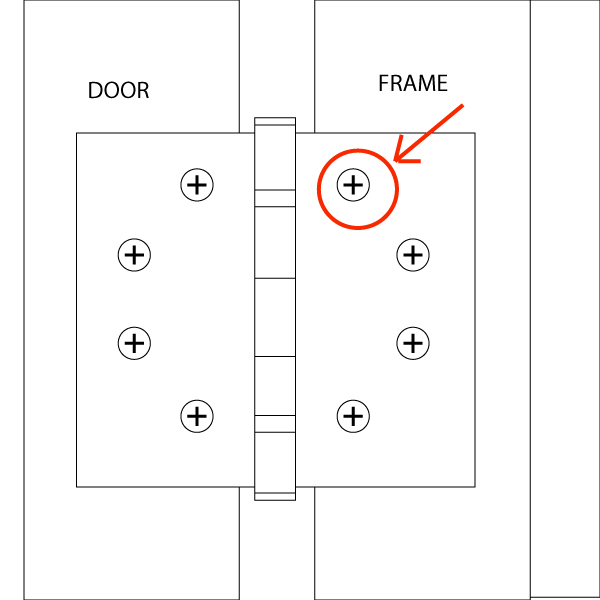
  3. Inspect the door for dents and abrasions.  For example, scratches at the top of the lock-side edge may indicate bent or loose hinges.   Dents may indicate attempted forced entry:  check for damage to internal lock parts.  A dent in the gap between the door and frame above the top hinge may mean an object was placed there.  The frame may be damaged and/or the top hinge may be bent.
  4. Inspect the hardware for damage, missing parts and/or wear.   If it is a hollow metal frame, are the silencers installed?  If there are no silencers the door will not align properly and the lock will not latch correctly.  Is the door closer leaking?  Does the door closer arm move smoothly?  Are the hinge screws all present and accounted for, and are they tight?  If there is a latch, there probably is a drag mark on the strike.  Does the drag mark reflect correct alignment?

In other words, look at the door, the frame and the hardware thoroughly and completely, and always do it the same way.  That way you won’t fix one problem just to return the following week to fix another problem that you missed.strike

Tools May Be Required

To identify a door hardware problem you may find it helpful to use instruments or tools.   For example, a carpenter’s level can help you determine whether a door or frame is level or plumb quickly and accurately, and a carpenter’s square can show immediately if the frame is true or sprung.   A tape measure may be helpful to check if hardware is correctly located, whether or not the gap between door and frame is consistently one-eighth inch, and if one leg of the door frame seems to be longer than the other.

One problem most swiftly identified using a carpenter’s level is positive pressure.   If you detach the closer arm and tape back the latch on a door that is level, and it swings open seemingly of its own accord, chances are it’s a positive pressure issue.  Positive pressure occurs when the air pressure inside the HVAC ducts is greater than the pressure outside, causing air to be constantly forced out of the structure.  Positive pressure can be powerful enough to prevent a door closer from closing the door, and sometimes the only cure is when the HVAC technician changes the settings on the air circulation system.

The positive pressure issue is one of those door hardware issues that may require someone besides a door hardware technician to fix.

Waiting For The Electrician

Problems with electro-mechanical and electronic locking systems, like positive pressure issues, may require a low voltage or electronics specialist to solve in addition to a door hardware technician.  For liability reasons it is important to use technicians who are appropriately licensed as required in your locality.

Often these problems are due to mechanical as well as – or even instead of – electrical or electronic issues.  Therefore the best situation for electronic or electrical door hardware triage is when the technician called upon to fix a problem is skilled in all three disciplines. Out in the world we are finding locksmiths that have their low voltage electrical technician license and a working knowledge of how to troubleshoot or program an access control system, systems integrators who can disassemble and repair a mortise lock, and even electricians who can adjust a door closer or repair an exit device.

This is a phenomenon driven by a market that desires to have one technician who can do everything, both for convenience and economics.  In any event, a technician equally skilled in these areas solves the problem of cross discipline communication.  If you’ve ever had to explain the difference between fail safe and continuous duty electrified door hardware to someone who just does not get these concepts you will understand what I’m talking about.

For this reason alone it behooves one in the door hardware repair and installation business to learn as much as they can and get all the credentials they need to be able to service all the door hardware out there in today’s electric and electronic world.

Closure

The age of door hardware in which we work today is the age of the renaissance woman or  man, student of many skills.  However, diagnosing the often complex ailments of doors and door hardware takes more than skill and knowledge:  it requires mindfulness, openness, resourcefulness and humility.  It is not only necessary to know what could go wrong (and doubtless will, according to Murphy’s Law); it is necessary to be aware enough to observe all the symptoms, to be open to all possibilities and to be imaginative in creating solutions.  One must also have the humility to realize that it is not possible for anyone to know absolutely everything.  Sometimes the most useful tool at your disposal is your mobile phone.  A call to factory tech support can often save hours of fruitless aggravation.


No man is an island – but some men belong on one. 

The Pressure’s On

balloonPositive Pressure Issues

Sometimes doors are required to perform conflicting functions simultaneously.  For example, in order to comply with the American Disabilities Act a particular door may be restricted to a door closer that requires as little as five pounds of opening force.  This same door may be required to lock automatically without fail.

One solution could be to use a non-hydraulic, motorized power operator (automatic door opener) instead of a standard hydraulic closer.  Since many non-hydraulic power operators do not depend on a spring for closing force it is possible for them to have an ADA compliant opening force and also exert a closing adequate to close and latch the door.  Most power operators that fit this description must be installed by AAADM certified installers.

Without the magic fix of the non-hydraulic power operator, all a door technician can do is fine tune the door so that it swings perfectly and is perfectly balanced; fine tune the locks, hinges and door closer to peak performance under the opening force restriction; and pray there isn’t a positive pressure or wind issue.

One caveat:  deprived of electricity, a non-hydraulic power operator will neither open nor close the door.

Positive pressure HVAC operation is a prime example of how the intended function of a door can be impeded or prevented by the normal operation of building infrastructure.   Positive pressure in a building is accomplished by using the HVAC system to add air from outside the building to the air that is already in the building.  As with a balloon, the added air pushes outwards in all directions.  When an exterior door is opened, air flows out through the open portal, acting as an invisible barrier that keeps outside air out.

Unfortunately positive pressure acts like a constant wind pushing on the inside of the exterior doors.   Since almost all exterior doors swing out, the net effect of positive pressure HVAC on exterior doors is that of blowing to doors open and/or preventing them from closing.

The non-hydraulic power operator idea discussed above can usually solve the problem, but I have had some success adjusting door closers to compensate for positive pressure situations.  I have found that a slow swinging speed followed by a fast latching speed will often accomplish the mission.  This solution, however, can create other problems such as creating a wider time window for unauthorized persons to enter while the door is still shutting, for example.

I have found no reliable fix for an opening subjected to positive pressure that must comply with ADA reduced opening force requirements; however, since positive pressure on out-swinging doors inherently reduces opening force, there is some hope.

In the best of all worlds, door hardware technicians and HVAC technicians work together to coordinate positive pressure ventilation needs with security and ADA compliance requirements.

Excerpt from Tom’s article “Butcher, Baker, Door Hardware Technician… ” published in the February 2015 issue of Doors and Hardware Magazine, magazine of the Door Hardware Institute.

The Obsolete Mortise Lock

Nothing lasts forever.  Like manufacturers of other mechanical devices, lock companies periodically update their products to be consistent with current technology.  They do this to make better, safer, more reliable products, and also to remain competitive in the market place.

Sometimes these new, updated products are backwards-compatible with older models of the same brand, sometimes not.   In the case of mortise locks I can say with some confidence, mostly not.   One cannot replace a Schlage K series mortise lock body with an L series and expect the trim to work.  The same is true of the newer Sargent 8200 vs. the older 8100 and the Yale 8800 series vs. the previous 8700 series.  As these older locks age and must be replaced these differences can become a problem, since the existing trims and cylinders on site may not be usable with the new lock bodies.  And there are still plenty of these older lock bodies out there.  Case in point, although the Yale 8700 series was discontinued in 2006, one facility I know is filled to the brim with these mortise locks.

Although I foresaw that they would not be able to use the existing trims with their new locks I failed to anticipate that the existing cylinders would also be incompatible.  But they were and here is why.  On the left the cam that works with the Yale 8700 is in the process of being removed from a Medeco small format interchangeable core (SFIC) housing.  In the first picture below, the correct cam has been installed.

DSCN4430DSCN4432


In the second picture you can see that the new cam is not only thinner than the old cam, it’s also slightly longer.  There is no way that old cam is going to work.  Luckily, on a Medeco SFIC housing the cams are interchangeable, unlike most others on which the cams are permanently attached.


Please visit my friends’ site:

http://www.americanlocksets.com/mortise-locks-c-38_159.html


Now I’m waiting to hear about the other SFIC housings on the job that have their cams staked on. But one cluster at time, eh?

The Wrap-Around Door Reinforcer

4CW2A wrap-around door reinforcer is a metal sleeve that slides over the door at the lock prep to conceal damage and/or reinforce the door.  They are a quick and handy solution when wood doors are damaged by forced entry and are often installed to strengthen new wooden doors against forced entry attempts.

In my experience a wrap does not really deter forced entry, but it does limit the damage done to the door.   I have found that when wood doors equipped with wrap around door reinforcers are burglarized, often only the wrap and the lock need replacing, not the whole door.   As with all door security hardware, if your lock is installed in a wrap-around door reinforcer and your neighbor’s lock is not, a would-be burglar may choose to break into your neighbor’s place instead of yours; however, this hypothesis is dependent on the highly dubious notion that a burglar is behaving rationally.  If the person were behaving rationally they would not risk their freedom and personal safety breaking into to somebody’s home to steal  their iPad or PC and selling it for chump change to their drug dealer.

Another benefit to using wrap-arounds is that they can act as a drill guide for lock installation.  Be careful, however, not to let the hole saw chew up the wrap.  Also, especially with stainless steel wraps, be sure not to let your drill bind up with the metal at high speed.  Injury would be likely.

Wraps are typically used on wooden doors, and while it is possible to use them on hollow metal doors, they never seem to fit quite right without a fight.  It seems that hollow metal doors measure exactly 1-3/4 inches thick whereas wood doors tend to measure closer to 1-11/16 inches.  Variations in door thickness affect the way a wrap will fit (or not fit) on a door.

A wide variety of wrap-arounds have been created to accommodate various locks and conditions.  Don Jo Manufacturing currently carries the largest assortment, and if a new kind of lock by a major manufacturer emerges, they are pretty quick to design a wrap for it.  To get the right borewrap for your application you need to know:

  • Door thickness
  • Size of the wrap you want
  • Diameter of the lock bore
  • Backset
  • Finish
  • Through-bolt holes (yes or no)

(see illustration)

Standard door thicknesses for wraps are 1-3/8 inches and 1-3/4 inches.  Some models of wraps are available thicker doors.   Wraps come in a variety of heights, but height is usually determined by the kind of lock the wrap is designed for and the backset.  See the illustration for bore, through-bolt hole and backset details.

For other wraps you may need other dimensions.  For example, Don Jo makes a number of wrap-arounds for interconnected locks and these (naturally) have two bores cut in instead of one.   If you need a wrap for a mortise lock you may have to change the trim on the lock to make it work, or you might have to drill lever, cylinder and thumb turn holes into a blank wrap to customize it to the lock you have.  See my warning about hole saws and stainless steel above.  I earned myself sprained fingers that way once.

I used to joke about certain doors that they could use a door sized wrap.  Then some enterprising individual actually brought one by.  The idea didn’t go anywhere, as far as I know, but it was a good concept:  one wrap covered the door completely in sheet metal and another covered the frame.  Still, at that point why would one just buy a hollow metal door and frame?

And that about wraps it up.

Schlage CO and AD Series Mortise Lock Parts

Schlage AD Series

Schlage AD Series

This just goes to show that there is no substitute for field experience. In the quest to provide the best service to his customer, this locksmith went past my advice and the advice of factory tech support to find the best solution.

The locksmith inquired about a replacement latch for a Schlage CO200MS mortise lock. I called Schlage Tech Support and they said that there were no replacement parts available for that CO-200 Series mortise lock chassis; that the entire mortise chassis had to be replaced for a hefty sum and I relayed this info to the locksmith. The locksmith, however, knew that Schlage advertised that the CO series locksets incorporated the Schlage standard L-series lock chassis “for durability and dependability.” Based on this, the locsksmith took a chance, went to the parts list for the L-Series mortise lock with the same function and ordered the replacement latch. He reports that is identical and works fine.

Good to know! One can assume that many parts from the L Series mortise lock with the same function will work in all AD and CO series mortise lock bodies. Like I said, you learn something new every day.

Thanks for stopping by.

What Is A Pullman Latch?

comparisonA Pullman latch is a type of exit device latch. The leading edge of a Pullman latch, the part that hits the strike first as the door closes, is a ramp.  The back of the latch, the part that rests against the strike to keep the door latched shut, is rounded.  When the Pullman latch comes into contact with another object it retracts automatically.  It is a simple, spring-loaded mechanism.

Some rim exit devices have Pullman latches, but most concealed and surface vertical rod exit devices do not.  Most vertical rod exit devices have a main latch that is shaped like a Pullman latch but also has an additional piece that looks like a kind of separate little latch, or auxiliary deadlatch.  This part interacts with the mechanism of the latch to keep the top latch retracted until this separate piece hits the strike as the door closes.  Then the main latch pops out and locks into the strike.

Latch release extended position.

Latch release extended position.

This latch-and-release design top latch is used by many manufacturers as the mechanism that holds both top and bottom latches in the retracted position while the door is open. That way the latches do not make contact with the surfaces of the door frame, floor or threshold.  When the top latch release makes contact with the strike it releases both top and bottom latches.

The photo to the left shows the latch release fully extended and the latch fully retracted.  This is the state that this type of latch is in when the door is open.

The Pullman latch is most often used with less-bottom-rod (A.K.A. top rod only) vertical rod exit devices when they are to be used with an electric strike.  The normal latch-and-release design is incompatible with most (if not all) electric strikes. Electric strikes that are compatible with Pullman latches are said to have Pullman keepers.

Sometimes Pullman latches are used as the top and bottom latches on vertical rod exit devices because they operate more quietly than standard latches.

Pullman latches are not fire rated and are not for use with fire rated exit devices.

pullmanlatchandkeeper

Illustration of Pullman latch and Pullman keeper. Whereas the locking surfaces of electric strike keepers designed for use with cylindrical or mortise locks is perpendicular to the door frame, the Pullman keeper is at a 45 degree angle to the frame, creating an angled recess to accommodate the unique shape of the Pullman latch.


Hardware Preparedness

Preparedness for the Commercial Door Hardware Installer

One of the most time consuming aspects of hardware installation is travel to and from the job.  In a perfect world, the installer knows in advance everything they will need, but as we all know, the World of Hardware is not a perfect one.   Often there is no opportunity to survey the job beforehand and the information given by the client is often either sketchy or nonexistent.   As a result, travel time to and from is often doubled or tripled by the necessity to ‘go back to the shop’ to pick up the parts needed to complete a given job.  A certain amount of travel time is billable, nevertheless your customer is not happy paying for it, trust me.

While it is virtually impossible for a hardware or access control installer to be always prepared for every need, here are some items that go a long way toward helping to reduce travel time that results from a lack of parts.

Generally Speaking

The first rule of hardware preparedness is to pay attention.  What kind of hardware does your customer have, and what do they have that tends to break?  If your customer has a building full of mortise locks will swivel spindles, best keep a few of those spindles on the truck because you know they are going to break in the middle.  If your customer has entrances with Doromatic 1690 or 1990 concealed vertical rod devices, you’d better stock a few pinion cams because you know the teeth are going to break off of them.  Whenever you repair anything that looks like it’s poorly made and notice there is a quantity of it on the property, best carry what you need to fix it.

If you are doing a lot of work for a client and they have a particular kind of lock, be sure to stock a few.  The property manager will be impressed when you triumphantly produce one from your service vehicle in the nick of time.

Fasteners

You know what fasteners you often find missing in action.  Undercut flat Philips head 12-24 1/2-inch self tapping hinge screws, for example.  In an emergency they can double as ANSI strike screws.  Collect those 6-32 3/4-inch combination machine/wood screws from tubular and cylindrical lock latch and bolt fronts.  They can double as screws for a mortise lock armor front if you cut them short.   For aluminum doors it can be very handy to carry some 10-32 x 2-inch flat head Philips machine screws, and its always good to have a few universal mounting tabs around just in case.

Other Stuff

On the electrical side it’s always good to have a SPDT relay, one each of a 12vdc and 24vdc 1-Amp plug-in power supply and a 4-1/2 x 4-1/2 4-wire electric power transfer hinge in satin chrome are all things that one tends to find oneself wishing for on the job; the Securitron TM-9 timer module sure does come in handy sometimes; on the lock frontier it’s always good to have a few cheap replacement cylinders for emergencies; and a full surface reinforcing pivot hinge can be a life saver sometimes, though because they are handed you do have to carry both hands for the full prophylactic effect.

In addition to these common sense items there are a couple of products that can save a parts run, too.

LCN 4040XP

The 4040XP in the RW/PA configuration (by the LCN Door Closer division of Ingersoll Rand) is a non-handed door closer like many others that can be installed in either regular, top jamb or parallel arm mount.  Its adjustable spring tension makes it a perfect choice for doors that require a lot of force to close due to wind or other conditions, or for an ADA compliant opening that must open with minimal resistance.  If the installer carries the closer and the 4040-18, 4040-18PA and 4040-18TJ drop plates, they will be able to install the 4040XP on almost any door.  The most popular finish of the 4040XP is 689 aluminum.

HES Electric Strikes with Faceplate Options

Hanchett Entry Systems (HES) has greatly advanced the concept of the modular electric strike since the company was founded.

  • The HES 1006 is field selectable for 12 or 24 volts DC power input, and with an optional Smart Pac line conditioner you can use anything from 12 to 32 volts AC or DC.   A variety of available faceplates for the 1006 enable the strike to accommodate virtually any lock.   Carrying a 1006 body with one each J option, K option, KD option and KM option faceplates and one Smart Pac will allow the installer to fill the need for an electric strike for 95% of all storeroom function cylindrical and mortise locks where the installation involves a hollow metal frame.
  • The HES 5200 is field selectable for 12 or 24 volts DC power input and any power input from 12 to 32 volts AC or DC with a Smart Pac.  Unlike the 1006, the 5200 is field selectable for fail safe or fail secure.  Since the 5200 has a three quarter inch keeper depth it will accommodate a mortise lock in a pinch, but really the 5200 is for use with cylindrical locks in hollow metal, wood or aluminum frame applications or for aluminum storefront door applications that include the Adams Rite deadlatch.  I recommend installers carry one each of the 501, 502 and 503 faceplate options to be prepared for the majority of these installations.

There are many things I’m sure I’ve missed:  electrical tape, fifty feet of 18/2 non-shielded wire, really sharp wood chisels, batteries – all kinds of stuff.  But don’t worry.  You’ll know what it is the next time you have to drive back to the shop to get it.


Tags